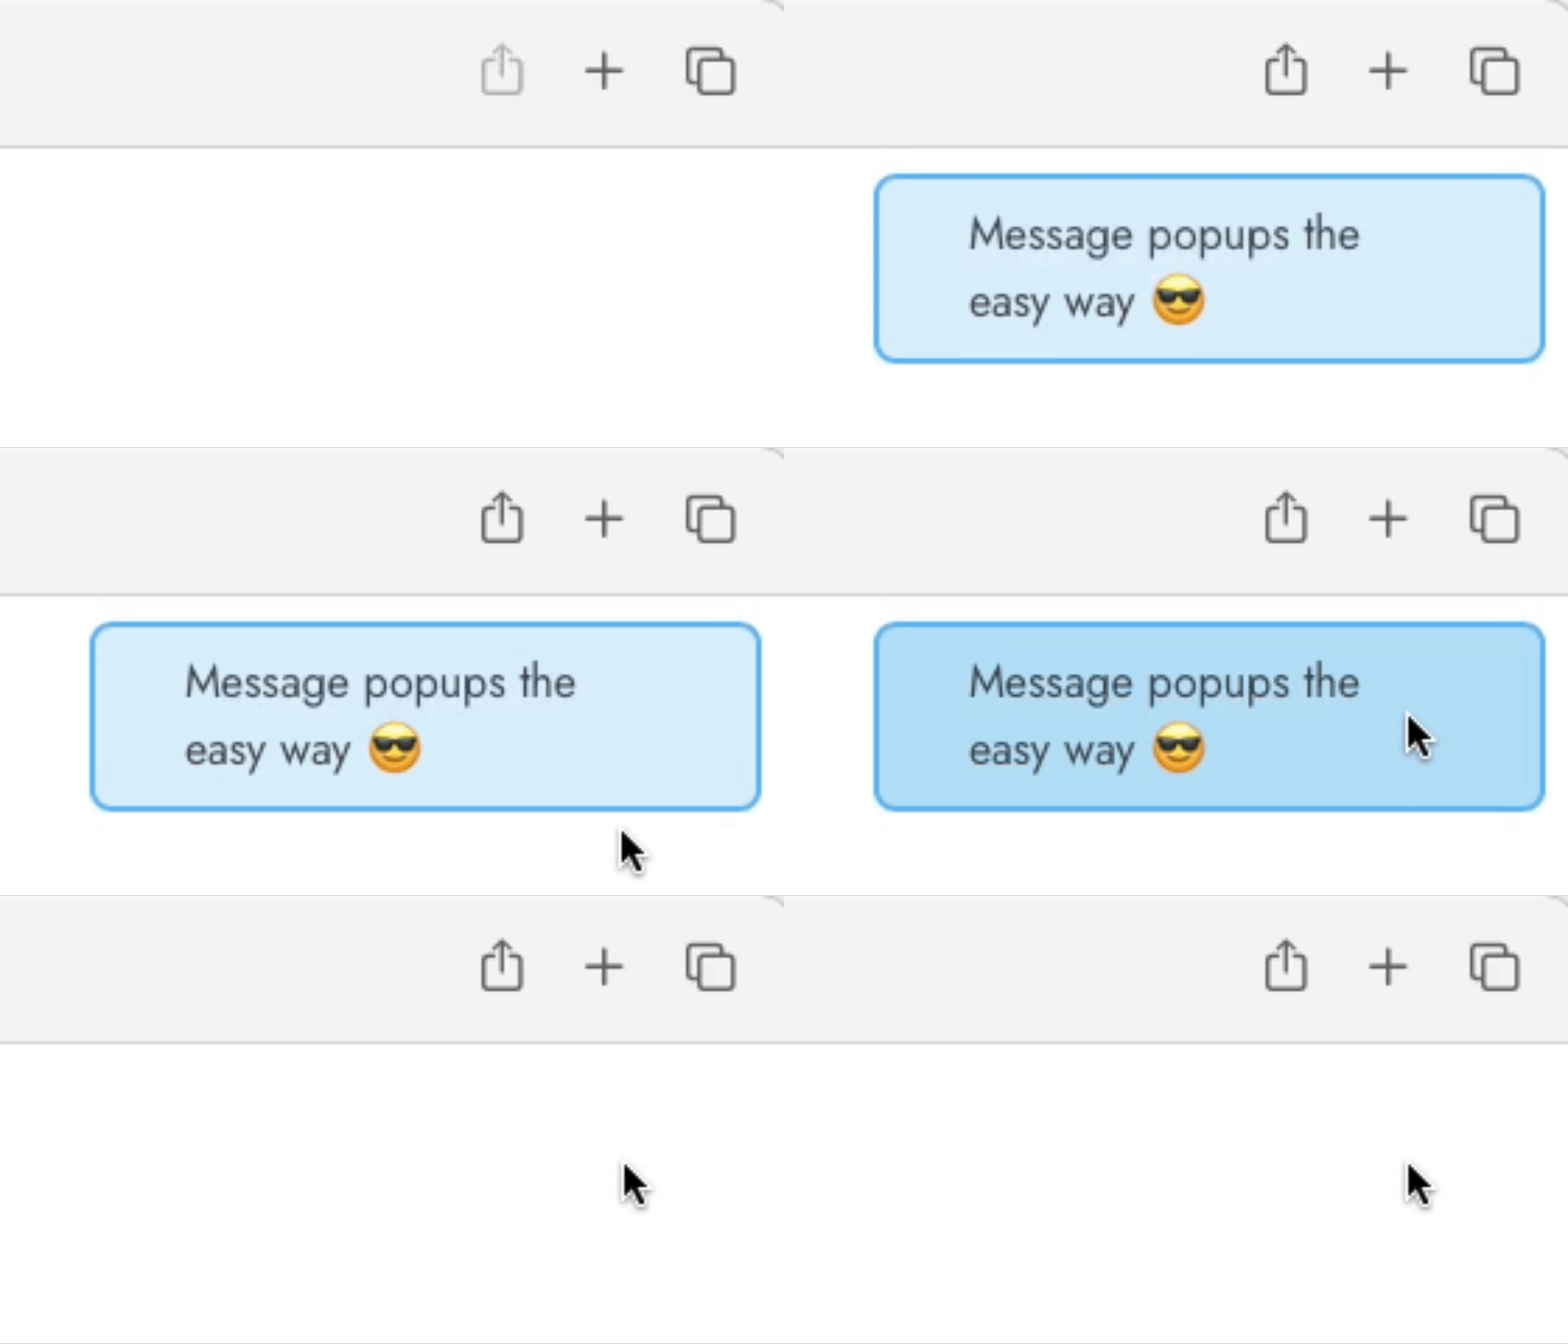
Popup toasts with Django messages, CSS and Hyperscript/HTMX
2023-11-14 | development, python, django

Popup messages that animate nicely and can be dismissed with a click
Dependencies #
This article assumes you are using a recent version of Django (~4.2). You’ll also need to install Hyperscript.
For the ability to create messages without a full-page refresh, you’ll also need HTMX.
Setup: Add messages to your base template, style them appropriately and add a dash of Hyperscript magic
#
In order for your messages to be displayed, they need to be included somewhere in your Django templates. In most cases, you’ll have a root.html template of some kind that defines your imports, meta options and so on - something that every page served by your application uses. This is the ideal place for a messages component since you don’t want to manually have to ’enable’ messages on a particular page.
The below snippet from a root template shows how to do this:
# templates/root.html
<ul class="messages" id="messages" hx-swap-oob="true">
{% if messages %}
    {% for message in messages %}
    <li {% if message.tags %} class="{{ message.tags }}"{% endif %}
    _="on click remove me
    on load wait 2s then add .message-deleting then wait 1s then remove me">
    {{ message }}
    </li>
    {% endfor %}
{% endif %}
The only “magic” part of this implementation is the bit starting with “_=” inside the <li> tag. This is
Hyperscript, and is used to (a) delete the message immediately on click; and (b) delete the message after a certain period of time. Animations are done in CSS and included below. The syntax of Hyperscript is explicit and self-documenting: a notification can be removed by clicking on it, otherwise it will disappear after 2 seconds via an animation.
The CSS used in this example isn’t special in any way. You can find it in the expandable section below.
Show example CSS
.messages {
  /* colors for different message types can be listed here */
  --color-info: #d9f0fc;
  --color-info-hover: #b4e0f7;
  --color-info-border: #50b6f5;

  /* Place on top of everything, at the right side of the page, without affecting any other elements.*/
  position: fixed;
  top: 0;
  right: 0;
  z-index: 9999;
  padding: 0.5em;
  pointer-events: none;
}

@keyframes slideInFromTop {
  0% {
    transform: translateY(-100%);
    opacity: 0;
  }
  100% {
    transform: translateY(0);
    opacity: 0.92;
  }
}

@keyframes slideOutToTop {
  0% {
    transform: translateY(0);
    opacity: 0.92;
  }
  100% {
    transform: translateY(-100%);
    opacity: 0;
  }
}

.messages > li.message-deleting {
  animation: slideOutToTop 250ms ease-out 0s 1;
  animation-fill-mode: forwards;
}

.messages > li {
  animation: slideInFromTop 250ms ease-in 0s 1;
  opacity: 0.92;
  pointer-events: all;
  list-style: none;

  /* formatting to your taste */
  width: 15em;
  height: 3em;
  padding: 2em;
  border-radius: 0.5em;
  font-size: 0.8em;
  border-style: solid;
  border-width: 2px;

  /* center content and add other formatting options*/
  display: flex;
  align-items: center;
  justify-content: space-between;
}

.messages > li.info {
  background-color: var(--color-info);
  border-color: var(--color-info-border);
}
.messages > li.info:hover {
  background-color: var(--color-info-hover);
}
Usage: Messages with a full-page refresh #
When following the standard request-response pattern with a full-page refresh, just use Django’s messaging framework:
# views.py

def my_view(request):
    # messages.NAME adds the class NAME to the HTML of the message
    messages.info(request, "Message popups the easy way 😎")
    return HttpResponseRedirect(reverse("myapp:mypage"))
Usage: Messages based on partial refreshes () #
With HTMX requests, besides adding a message in the view itself with e.g. messages.success() as shown above, you must ensure that the response that your HTMX request returns includes the message HTML component as well as well. If you just return a plaintext HTTP response, or use a template that does not include the message component, the popup will not work correctly.
As a simple example, if you want a response to return e.g. “OK 😎” to replace an element where the user clicks a button, but also show a popup message at the top, the template should minimally return something like the example below:
<ul class="messages" id="messages" hx-swap-oob="true">
    <li class="info">
        "Message popups the easy way 😎"
    </li>
</ul>

<div id="my_custom_response_id">
    OK 😎
</div>
By default, HTMX replaces just a single part of the DOM. In this case we want to replace something in the calling part of the DOM, but also update the messages component of the page separately - essentially doing two changes in different places of the page. To do that, we’ll need to include and set the
hx-swap-oob option as shown above.
To reduce repetition of the messages block across your partial templates, you can extract it out and reference it like this:
{% extends "messages.html" %}
{% block content %}
<div id="my_custom_response_id">
    OK 😎
</div>
{% endblock content %}